We get asked “how to form a concrete trench drain” quite often. People often think that they will save a lot of money forming a poured in place concrete trench drain. A good old fashioned hand formed concrete trench drain is labor intensive but very flexible in terms of design. The contractor can easily adjust width, depth, slope, and add almost any feature desired. The down side to hand forming a concrete trench drain is that it takes skill and time to get it right. On this page I will give some of the basics of how to form a concrete trench drain. We also sell the frames and grates to make a hand formed trench drain. If you are not sure you have the skill to form a concrete trench drain consider one of our precast trench drains or trench drain forming systems. These prefabricated trench drain systems make it easy to get a quality trench drain.
Since you made it this far, we will assume you have the carpentry skills to form and pour your own poured in place concrete trench drain. Lets start the meat of how to form a concrete trench drain. Start with the concrete trench drain design. Select the frame and the trench drain grate based on your design criteria. This needs to be done before you form the drain. In fact, we have a lot of calls from contractors who have formed a cast in place trench drain and now can’t find a grate to fit the trench drain dimensions they have formed. In the end this will cost you more because you will need a custom fabricated trench drain grate. Also, it may be difficult to reach the required load rating due an improperly sized trench seat size.
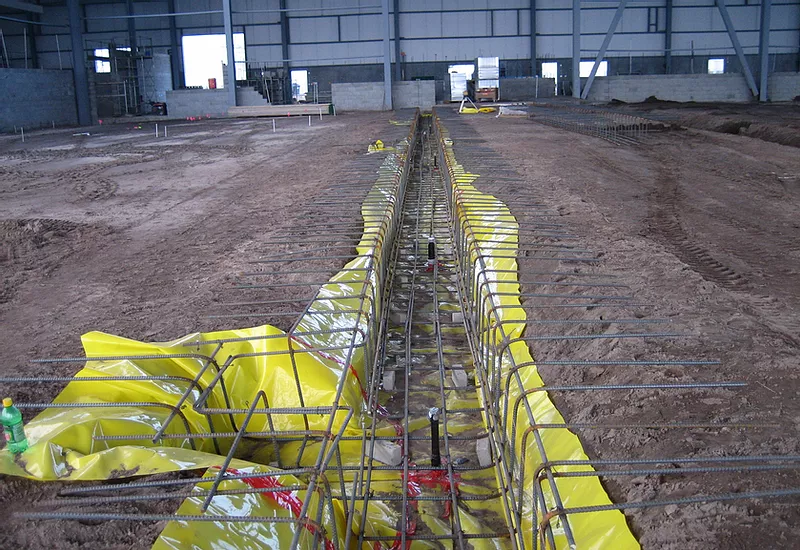
A hand formed concrete trench drain can have a formed concrete grate seat or an embedded frame. We recommend an embedded frame. Without a frame the grates sit directly on the concrete. This can put excessive stress on the concrete and it will cause the concrete ledge to shear off over time. The upper lip next to the grate is also unsupported leaving the upper edge of the trench drain susceptible to spalling and shear failures. A good trench embed frame will give your grates a proper ledge to sit on that will ensure the hand formed concrete trench drain has a long life.
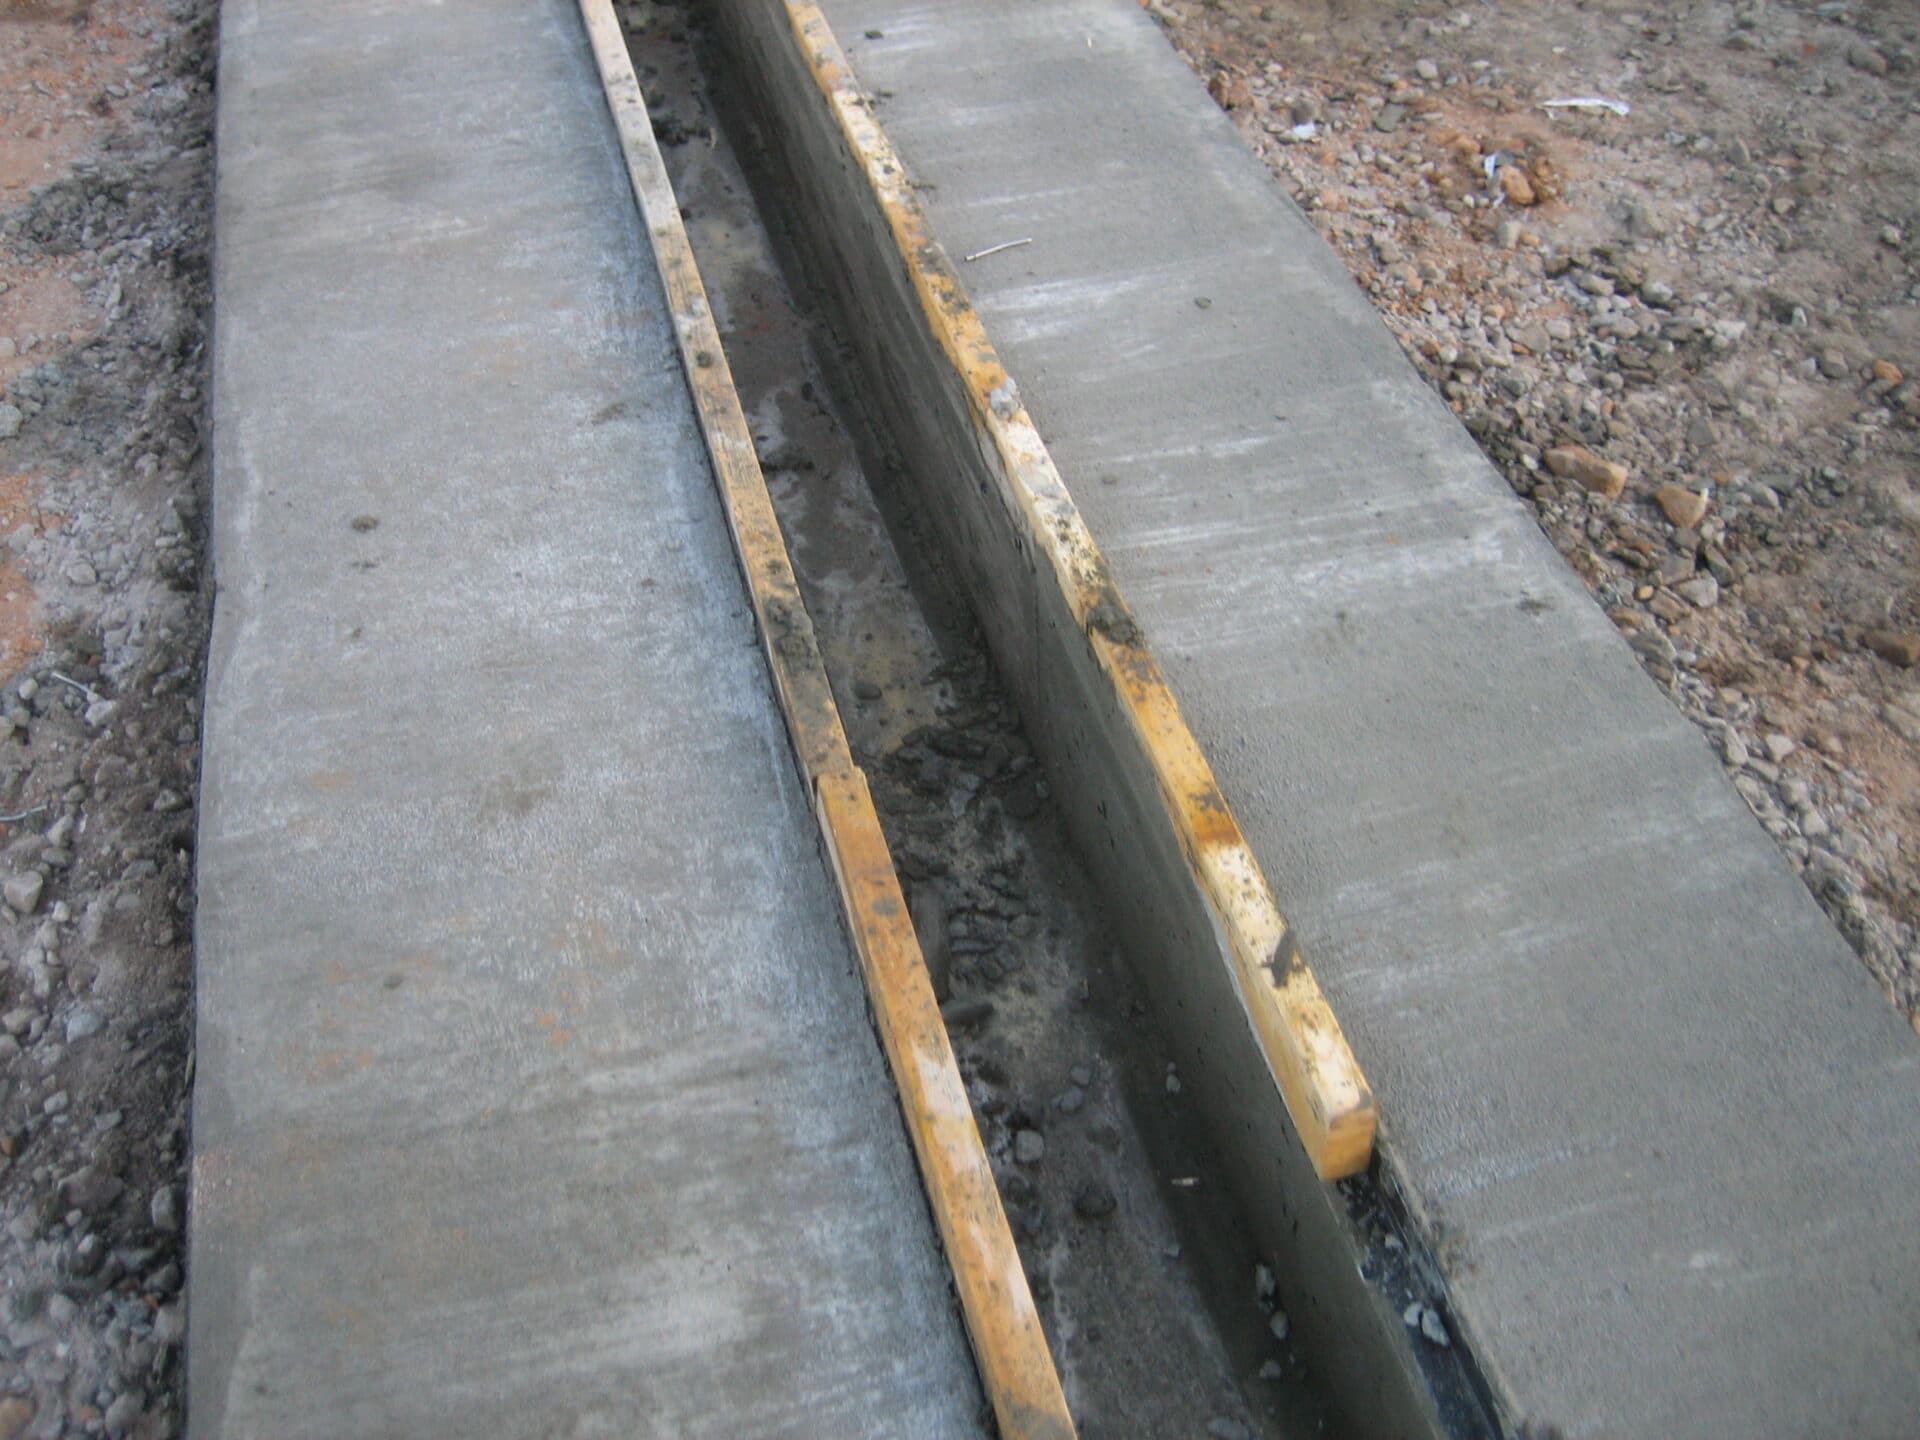
Once your trench drain frame and grate have been selected, you must determine the width to form the drain. The grate seat is the ledge where the grate sits to keep it from falling into the trench. This ledge must be the right width and it must be co-planar (meaning the same elevation – more on this when we discuss the actual forming). The width of the grate seat is typically the grate width plus 1/4″. This should govern the width of your trench drain form work. The forms will be set such that the inside face of the trench drain frame is 1/4″ wider than the grate. If the opening is too narrow the trench grates will not fit in the opening and will be difficult to remove for cleaning. If the opening is too large the grates will slide, look unsightly, or fall into the opening.
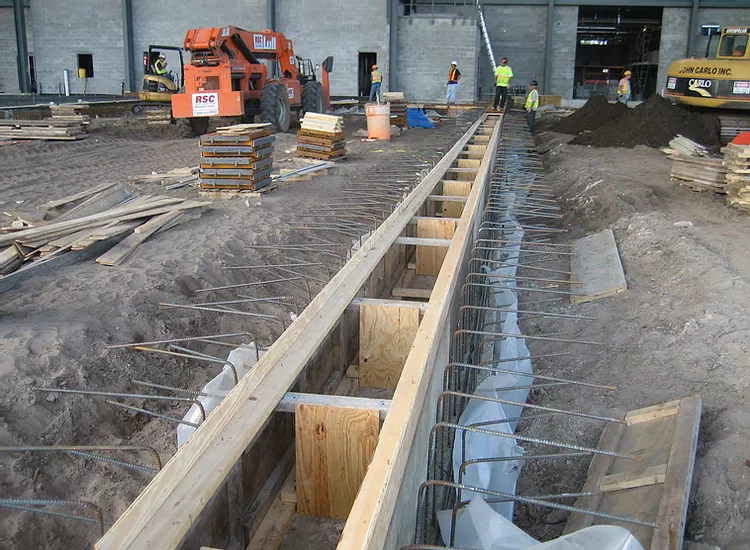
Now let’s discuss the basics of hand forming a concrete trench drain. First excavate the ditch to the depth of the drain plus the thickness of the concrete. Next, install any required rebar. Note for a poured in place concrete trench drain you should have U shaped rebar to hold the trench drain walls and footer together. Next, you need to set the elevation of the top of the footer concrete. This will end up being the flow line of the concrete channel drain. This can be done with a laser on a slope or forming lumber can be placed outside the rebar cage and set on the correct slope to show you at what height to pour the concrete. Note that the footer of a hand formed concrete channel drain is typically 6″ wider on each side than the total width of the trench walls. This is to allow the trench wall forms to be installed on top of the concrete footer.
Next, pour the concrete trench drain footer. If the trench drain is deep or inside a building you will need to install a water stop. If you choose to use a pvc water stop you can wet set it into the concrete before it cures. If you are using a swell stop it can be installed after the concrete firms. Note that the inside portion of the concrete needs to be troweled smooth. The inside will be the flow line of the hand formed concrete trench drain and should be very smooth to improve flow and reduce debris. The outside should be flat enough to place forms on but does not have to be perfectly smooth. A simple float finish can be used outside the rebar cage.
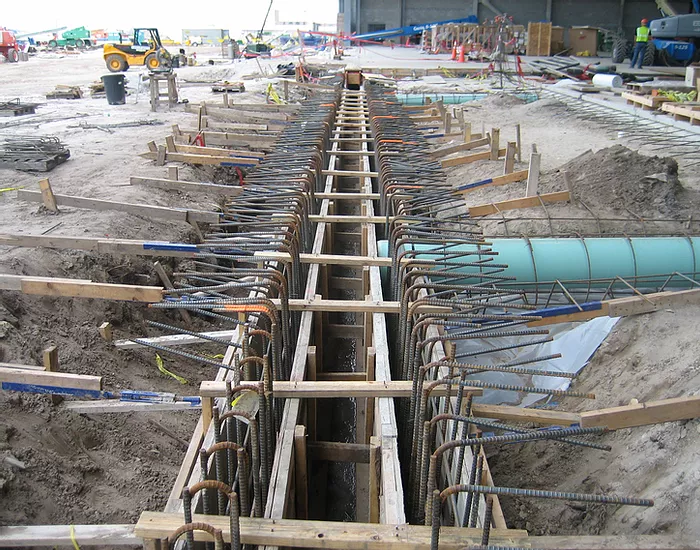
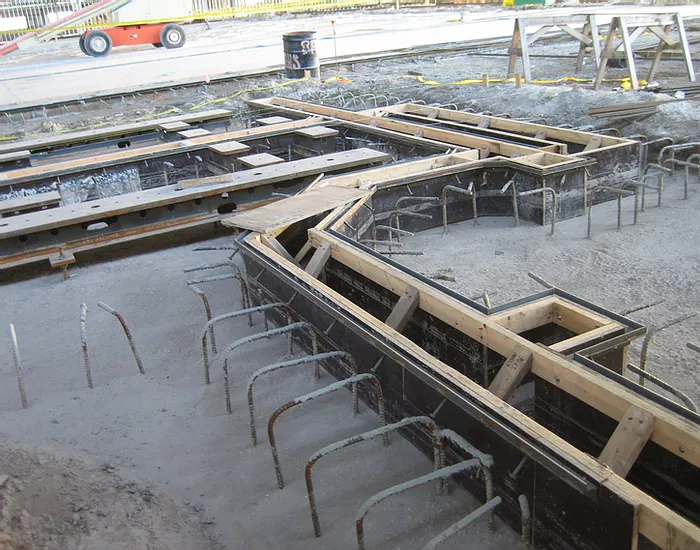
Next you will want to form the inside of the concrete trench drain. Set two forms with smooth side out (toward the rebar cage). Typically these are nailed or screwed to the bottom of the trench drain footer. Now brace these forms from one to the other across the inside of the trench drain. Be sure to cross brace from the bottom of one form to the top of the other. This will prevent any racking of the forms during the concrete placement. This is a critical step because any racking of the form work will make the trench drain grating not seat properly.
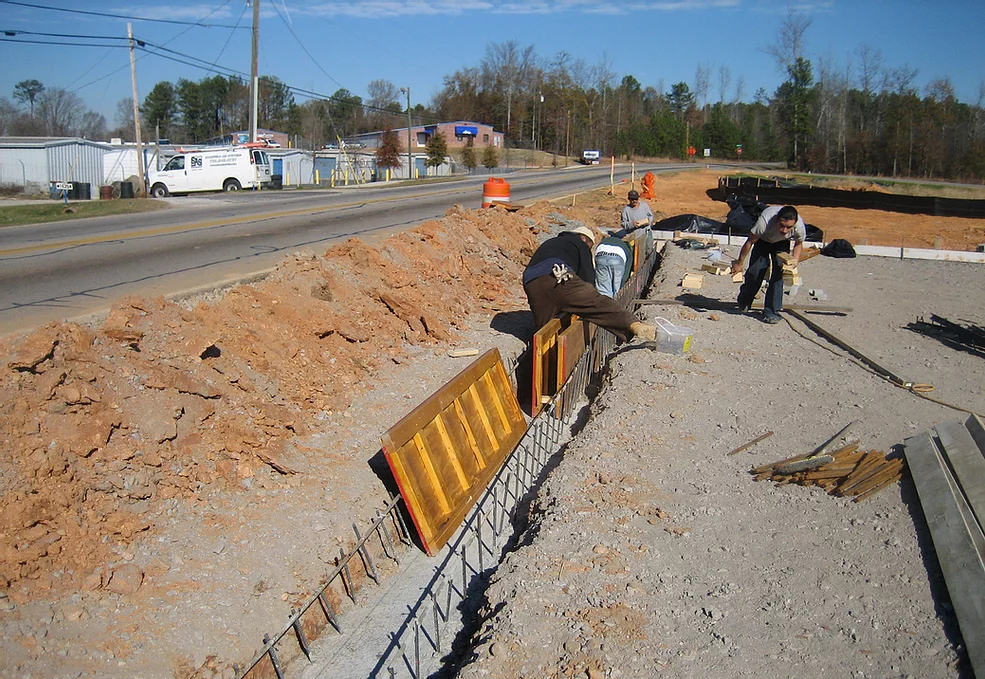
Now set the top of the trench drain frames at the finish elevation (top of concrete). To do this you will need a strip of wood the thickness of the grate and the width of the frame. Nail this to the forms at the prescribed elevation. It is critical that both sides have the exact same elevation. If they do not the trench drain grates will rock and rattle as traffic crosses them. This is a very common problem for hand formed concrete channel drains. This rocking of the grates puts extra stress on the concrete trench drain and can cause premature failure. Once these are set properly double and triple check the width from inside of frame to inside of frame to ensure it is the grate width plus 1/4″. Also make sure the forms do not move, bow, twist, or have any other movement when you push and pull on them. The hand formed trench drain walls should be completely stable before you even think about pouring concrete.
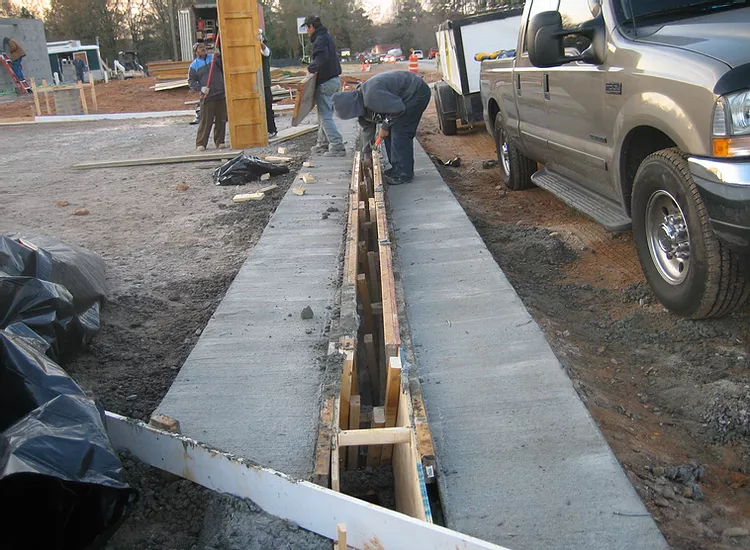
The next step is to set the outer edge forms. It is best to set the top of these forms to the exact height of the finish grade. Note that these should be a little higher than the top of the trench drain frame. This ensures water flows into the drain and doesn’t hold water back behind the channel drain. The concrete should slope toward the trench drain grates at a minimum rate of 1/8″ per foot (1/4″ per foot is preferred). Brace these forms to ensure they don not move during the concrete pour. It is best to brace these to the earth behind so that there are no braces extending to the trench drain form work. Any braces in that area will inhibit the finishing of the concrete.
Finally it is time to pour the hand formed trench drain. Before you order the concrete we recommend you do one final check on the width of the frames and elevation of those frames. This is the critical part and if they are too wide or too narrow the channel drain grates will not fit. Measure 3x and pour one time. Double check that all form work is very rigid and cannot move. Once everything is checked, order the concrete and place it to the top of the frame. Be sure to vibrate the concrete well to remove any trapped air. Any trapped air will show up on the inside of the drain walls once the forms have been removed. Once the concrete has set, remove all forms and install the trench drain grates. Now your hand formed trench drain is complete.